
Rustic Mug Rug Crochet Pattern + Video
There's something undeniably delightful about adding a touch of handmade charm to your home decor. Today, I'm excited to share with you a fun and functional crochet project: rustic crochet mug rug coasters. These adorable coasters resemble miniature floor rugs and are sure to add a cozy vibe to your living space while protecting your surfaces from spills and stains.

The Joy of Small-Scale Crochet Decor
I've always had a soft spot for small-scale crochet projects. Whether it's experimenting with quirky shapes like my sandwich coasters or spiral coasters, there's an undeniable satisfaction that comes from creating something both cute and practical. These mug rug coasters are no exception—they're quick, easy, and oh-so-satisfying to make.
Crocheting Your Mug Rug Coasters
These coasters are crafted using a variation of the crochet grit stitch. I have a tutorial on this stitch in case you want to practice before creating your crochet coasters. I recommend using worsted weight cotton yarn because it’s sturdy, durable, and washable but any kind of yarn will work. You can make these mug rugs in all sorts of color combinations or keep them simple with a solid color. Think of the room where they’ll be used and pick out colors that will complement the overall look of the space.
Skill Level: Easy
Size: Without fringe - 6.5” length x 5.5” width
Materials
Worsted weight (4) cotton yarn, approx. 30 grams
5.00mm crochet hook
Scissors
Yarn needle
(Optional) brush or comb to make fringe
Stitch Abbreviations (US Terms)
ch - chain
st - stitch
sc - single crochet
dc - double crochet
sk - skip
Pattern Notes
The starting chain counts as a stitch. Work the last stitch into the turning chain from the previous row.
Mug Rug Crochet Pattern
Chain 21
Row 1: dc into the 3rd ch from your hook (the 2 chains you skip count as your first sc), * ch 1, sk 1 ch, in the next ch make (1 sc, 1 dc) in the same chain, repeat from * until there are 2 chains left, ch1, sk 1 ch, sc into the last chain, turn your work to start the next row.
Row 2: ch 1 (this counts as your first single crochet), dc into the first stitch (right next to the chain 1), * sk the next dc, in the next sc make (1 sc, 1 dc) in the same st, repeat from * until you reach the last two stitches, sk 1 st, sc into the turning chain from the previous row, turn.
Repeat Row 2 until you have 14 rows total or the coaster is approximately 5 ¼-5 ½”
Once your coaster is the desired size, cut the yarn leaving a tail long enough to weave in with a yarn needle. Weave in all ends for a neat finish.
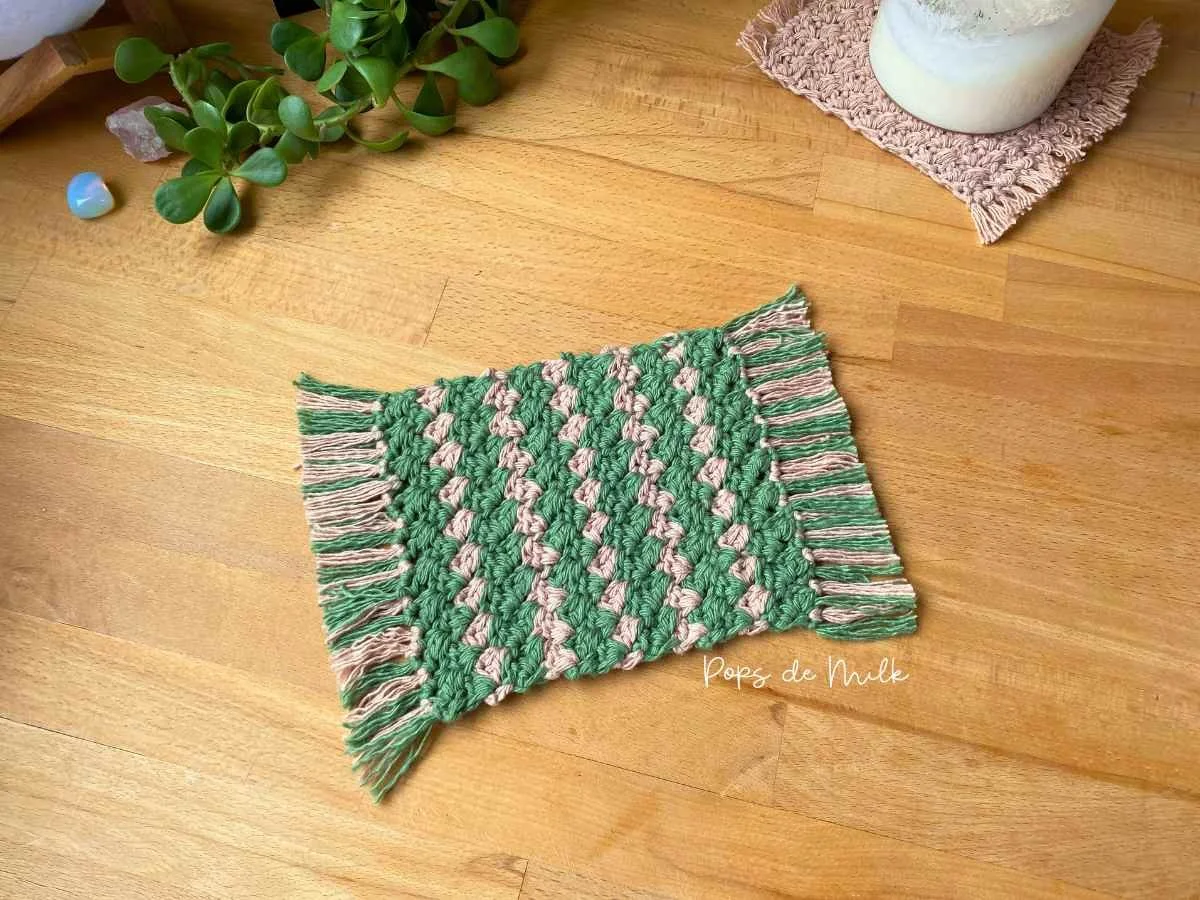
Optional Fringe for Extra Flair
While your coaster is already perfect on its own, you can add an optional fringe for an extra touch of rustic cottagecore spirit. Here's how:
Cut several short strands of yarn, about 4-5” in length.
Use your crochet hook - a smaller hook size may work better in this step - to loop and secure each strand into every stitch along the first and last rows of your coaster.
Untwist and pull apart each strand to create a fluffy fringe effect.
Gently give the fringe a brush with a comb or brush to fluff it up, then trim any uneven edges with scissors for a neat and polished look.
Your Rustic Crochet Mug Rug Coasters are ready to use!

If you make these crochet mug rugs I would love to see your creation, just tag me on Instagram @popsdemilk_crochet
Looking for more crochet coasters? Check these out:
Sandwich coasters crochet pattern
**********
This pattern is for personal use only. The pattern and its photos may not be reproduced, distributed or resold, translated, published, altered, shared or posted in any way over the internet or offline.
You may sell finished items made from this pattern as long as it is handmade by you, not mass produced, giving the credit to Pops de Milk / Patricia Castillo as the designer. If you have any questions, you can email me at patricia@popsdemilk.com