
Crochet Onigiri Amigurumi Charm
Sometimes you just need to make crochet food that makes you smile, and this little onigiri amigurumi charm does exactly that.
I’ve had this idea swimming around in my head for a while, probably ever since watching Demon Slayer and seeing Tanjiro happily devour a mountain of rice balls. Their simple triangular shape felt so satisfying, and I thought: what if I could crochet one and, not flat, but dimensional, round, and squishy?
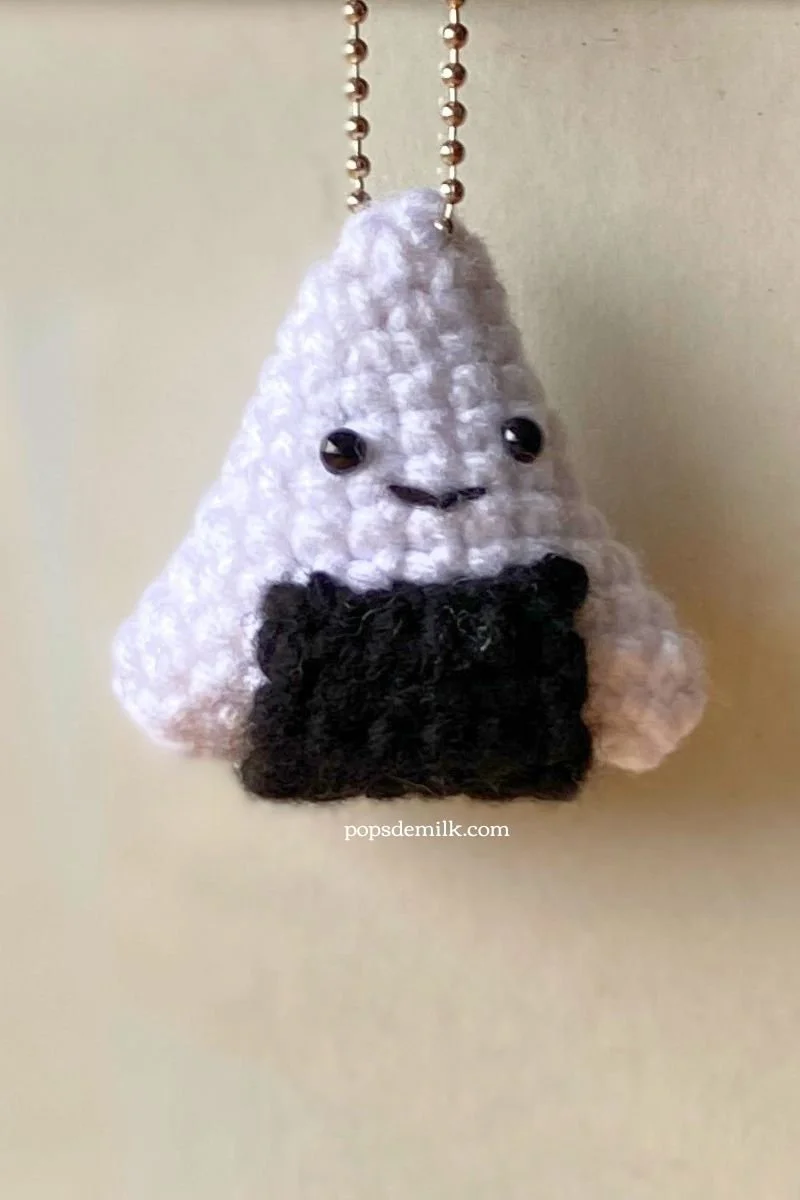
The result is this cute little amigurumi onigiri: part food, part kawaii desk companion, and part anime-inspired charm.
Why Crochet Onigiri?
It’s quick: You can make one in an evening with just a little yarn.
It’s stash-friendly: White and black worsted cotton or acrylic? Chances are you’ve got some lying around.
It’s versatile: Keep it as desk décor, turn it into a keychain, or attach it to your favorite bag like I did.
It’s cute: Need I say more? Squishy rice triangles with faces are absolute cozy-nerd vibes.

The Fun (and Challenge) of Shaping
One of the things I love about this project is how the triangle shape takes form. Instead of increasing evenly in a circle, you only increase twice per round, directly opposite each other. That’s what gives the little rice ball its triangular look.
There’s a bit of trial and error, but that’s the fun of amigurumi: experimenting with increases, counting stitches, and suddenly realizing, hey, this is actually a triangle!
Adding the Personality
For the “seaweed,” I stitched up a simple black rectangle and wrapped it around the base.
And of course, the face. I went with tiny 4mm safety eyes and a wonky embroidered smile. It’s a smirk, and honestly, I think the slightly uneven expression makes it even cuter. If you’re gifting this to a child (or you have pets), definitely embroider the eyes instead of using safety eyes.
Turning It Into a Charm
You can make the onigiri and have the sweetest little desk buddy, OR, if you want to carry your crochet food around, just add a keychain ring or ball chain. Mine is now clipped to my Tanjiro bag, and every time I see it, I can’t help but grin.
Tip: If you know you’re turning it into a charm, add or work the charm loop or chain into the rounds before you stuff and close the onigiri. Trust me, it’ll save you a lot of fiddling - I sure wish I had thought of it when I made mine.
Final Thoughts
This onigiri charm is one of those projects that reminds me why I love amigurumi. It’s small, quirky, and fun. It’s the kind of project that serves no practical function other than to bring instant joy. Plus, it’s proof that even the simplest shapes can become adorable with the right details.
If you’re new to amigurumi, this is a great little project to try. And if you’re a fellow anime or food-themed-crochet lover, you need one of these hanging on your bag.
So grab your yarn, make a magic ring, and let’s crochet something that’ll make you smile every time you see it.

Onigiri Charm Crochet Pattern
Materials
Worsted weight yarn in white and black
3.50mm hook
Stitch marker
Polyfil stuffing
Safety eyes
Scissors
Yarn needle
Approximate Finished Size: 3 x 3 inches
Abbreviations (US Terminology)
ch: chain
sc: single crochet
inc: increase (2 sc in same stitch)
dec: decrease (sc two stitches together)
st(s): stitch(es)
Pattern Notes
Use the yarn under technique for a tighter stitch, plus it makes it look more like grains of rice!
For the rice ball, work in continuous rounds, do not turn or join at the end of each round.
For the seaweed, work in rows, turn at the end of each row and start with a chain (does not count as a stitch).
Pattern Instructions
Rice Ball
Rnd 1: make 6 sc in magic ring
Rnd 2: (inc in next st, sc in next 2 sts) x 2 (8 sts)
Rnd 3: inc, sc in next 3 sts, inc, sc in next 3 sts (10 sts)
Rnd 4: inc, sc in next 4 sts, inc, sc in next 4 sts (12 sts)
Rnd 5: inc, sc in next 5 sts, inc, sc in next 5 sts (14 sts)
Rnd 6: inc, sc in next 6 sts, inc, sc in next 6 sts (16 sts)
Rnd 7: inc, sc in next 7 sts, inc, sc in next 7 sts (18 sts)
Rnd 8: inc, sc in next 8 sts, inc, sc in next 8 sts (20 sts)
Rnd 9: inc, sc in next 9 sts, inc, sc in next 9 sts (22 sts)
Rnd 10: inc, sc in next 10 sts, inc, sc in next 10 sts (24 sts)
Rnd 11: inc, sc in next 11 sts, inc, sc in next 11 sts (26 sts)
Attach safety eyes, embroider a mouth, and start to add stuffing.
Rnd 12: dec x 2, sc in next 9 sts, dec 2, sc in next 9 sts (22 sts)
Cut yarn leaving a long tail for sewing. Use a yarn needle to sew the opening closed.
Seaweed Strip
With Black yarn
Row 1: ch 6, sc in 2nd ch from hook and each ch across, turn (5 sts)
Row 2: ch 1, sc in each st across, turn (5 sts)
Rows 3-12: Repeat Row 2
Cut yarn leaving a long tail for sewing.
*****
This pattern is for personal use only. The pattern and its photos may not be reproduced, distributed or resold, translated, published, altered, shared or posted in any way over the internet or offline.
You may sell finished items made from this pattern as long as it is handmade by you, not mass produced, giving the credit to Pops de Milk / Patricia Castillo as the designer. If you have any questions, you can email me at patricia@popsdemilk.com