
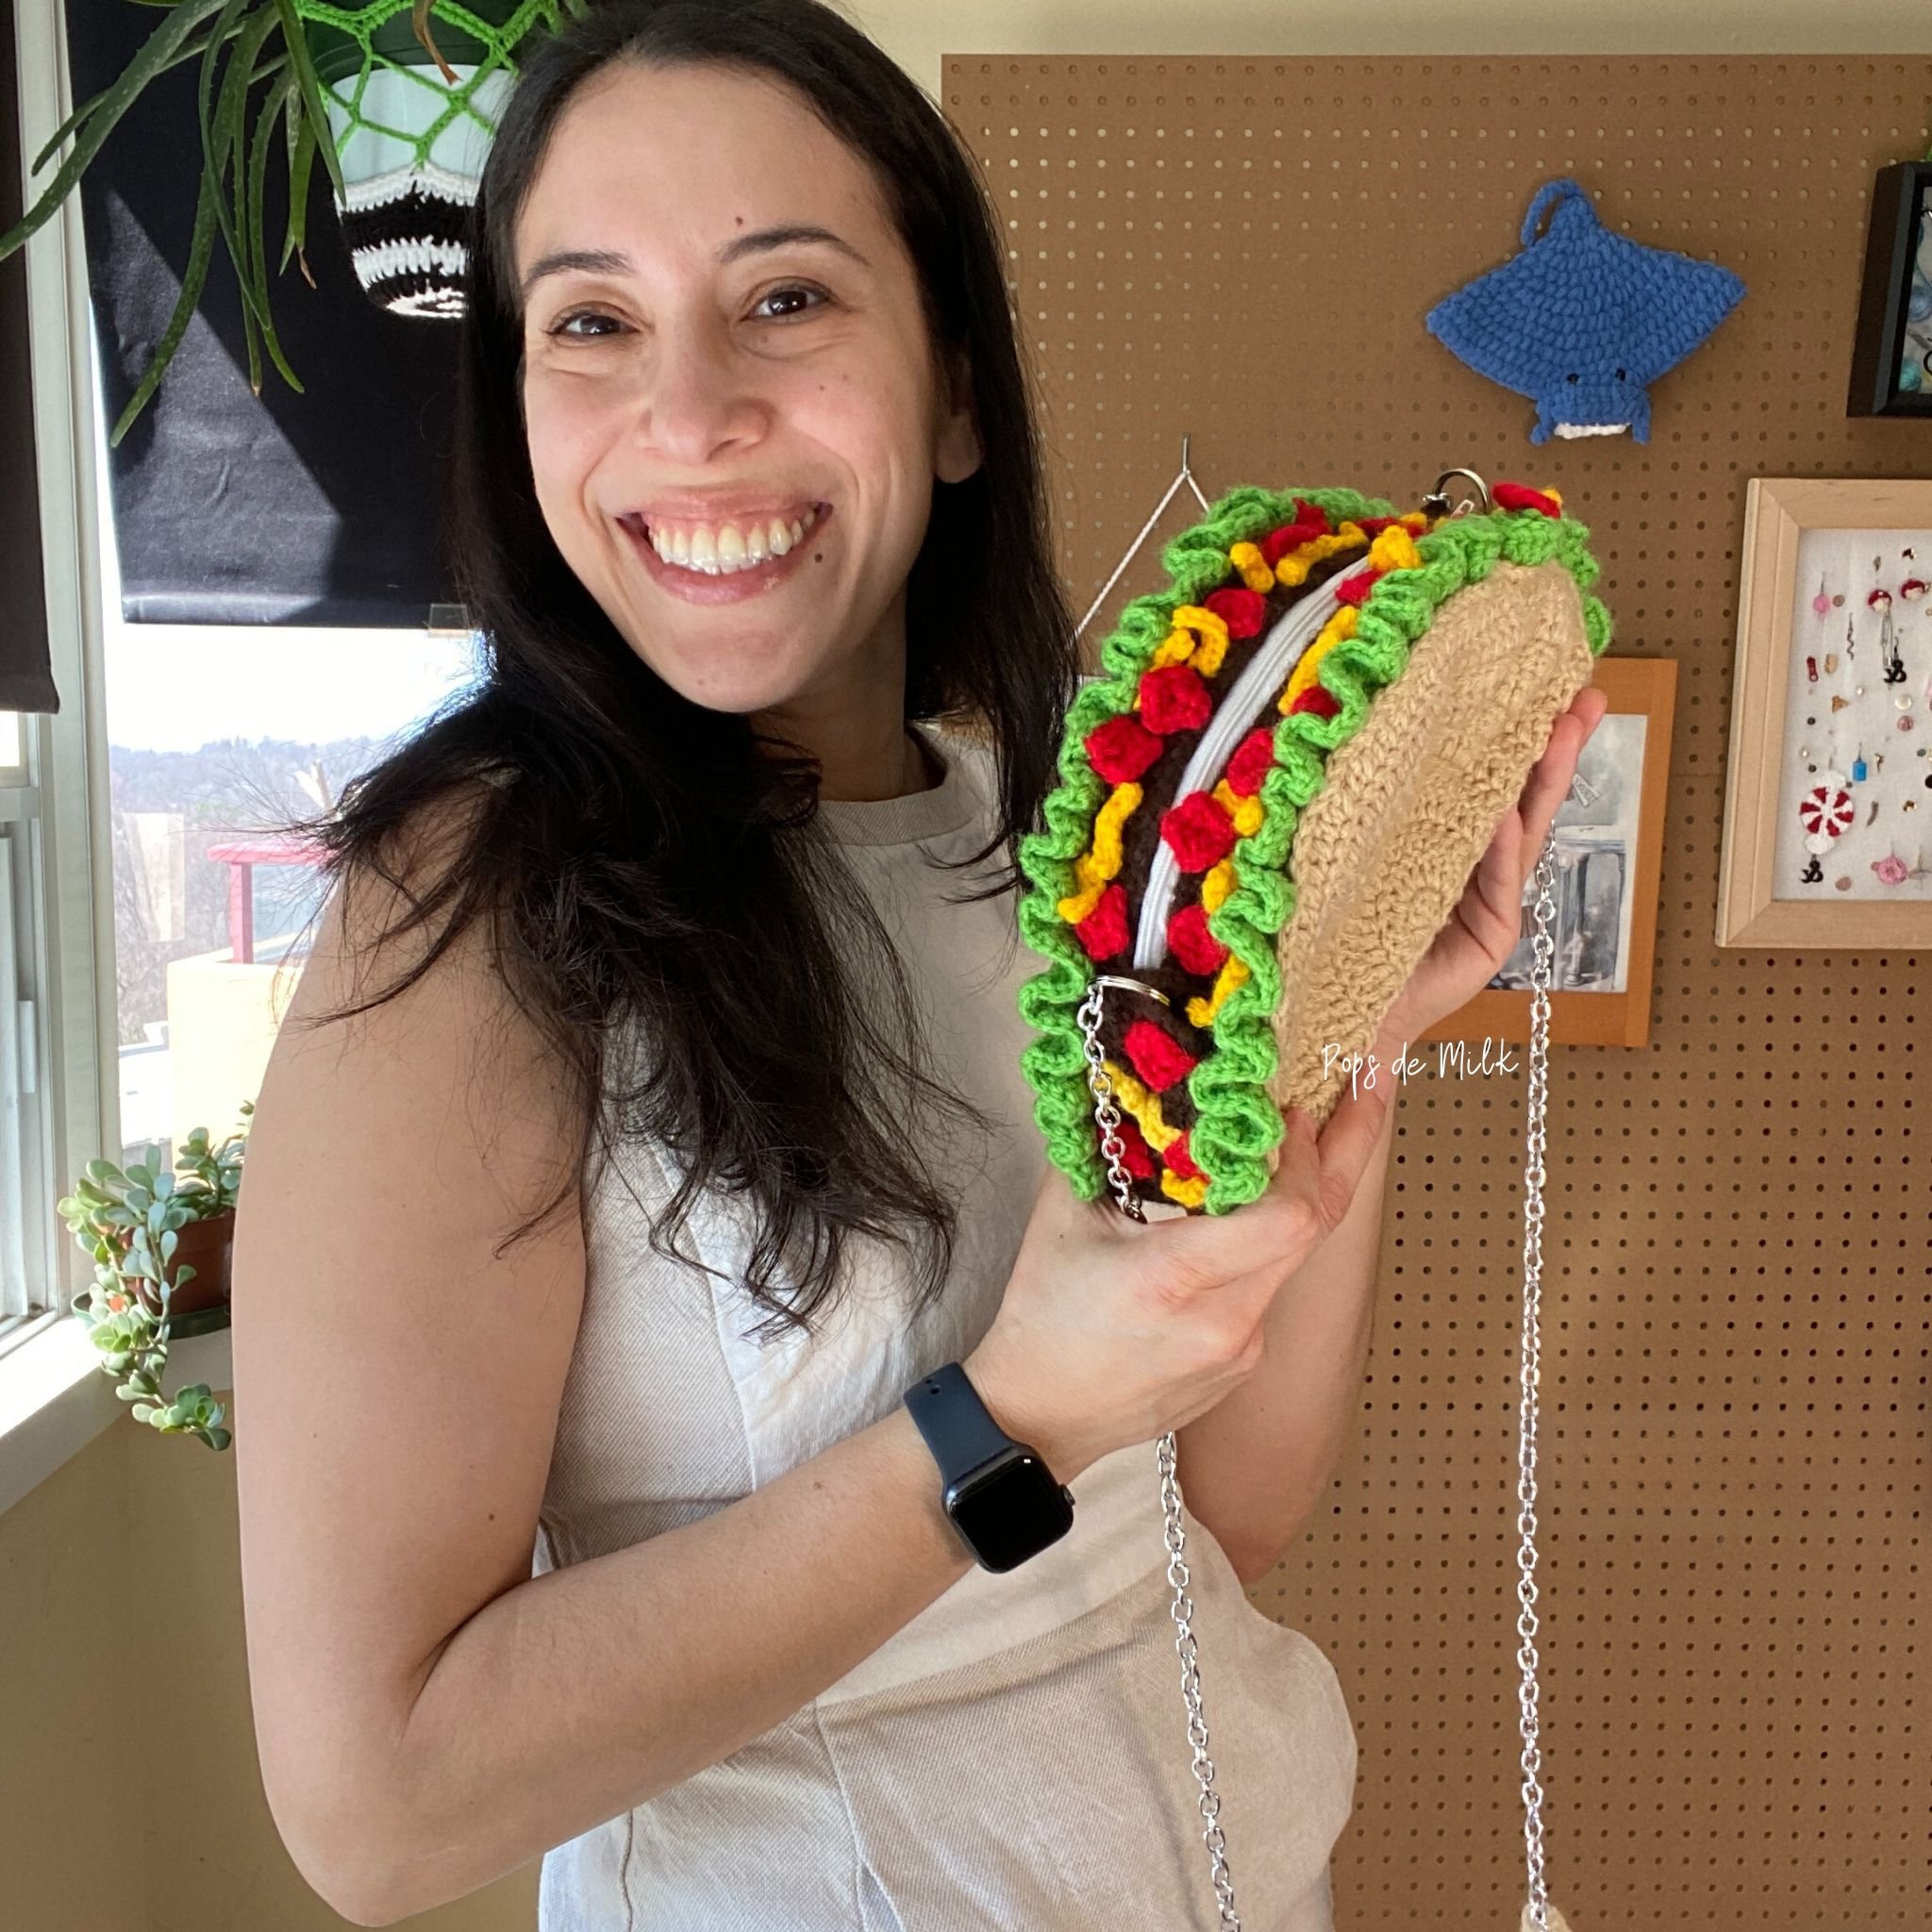
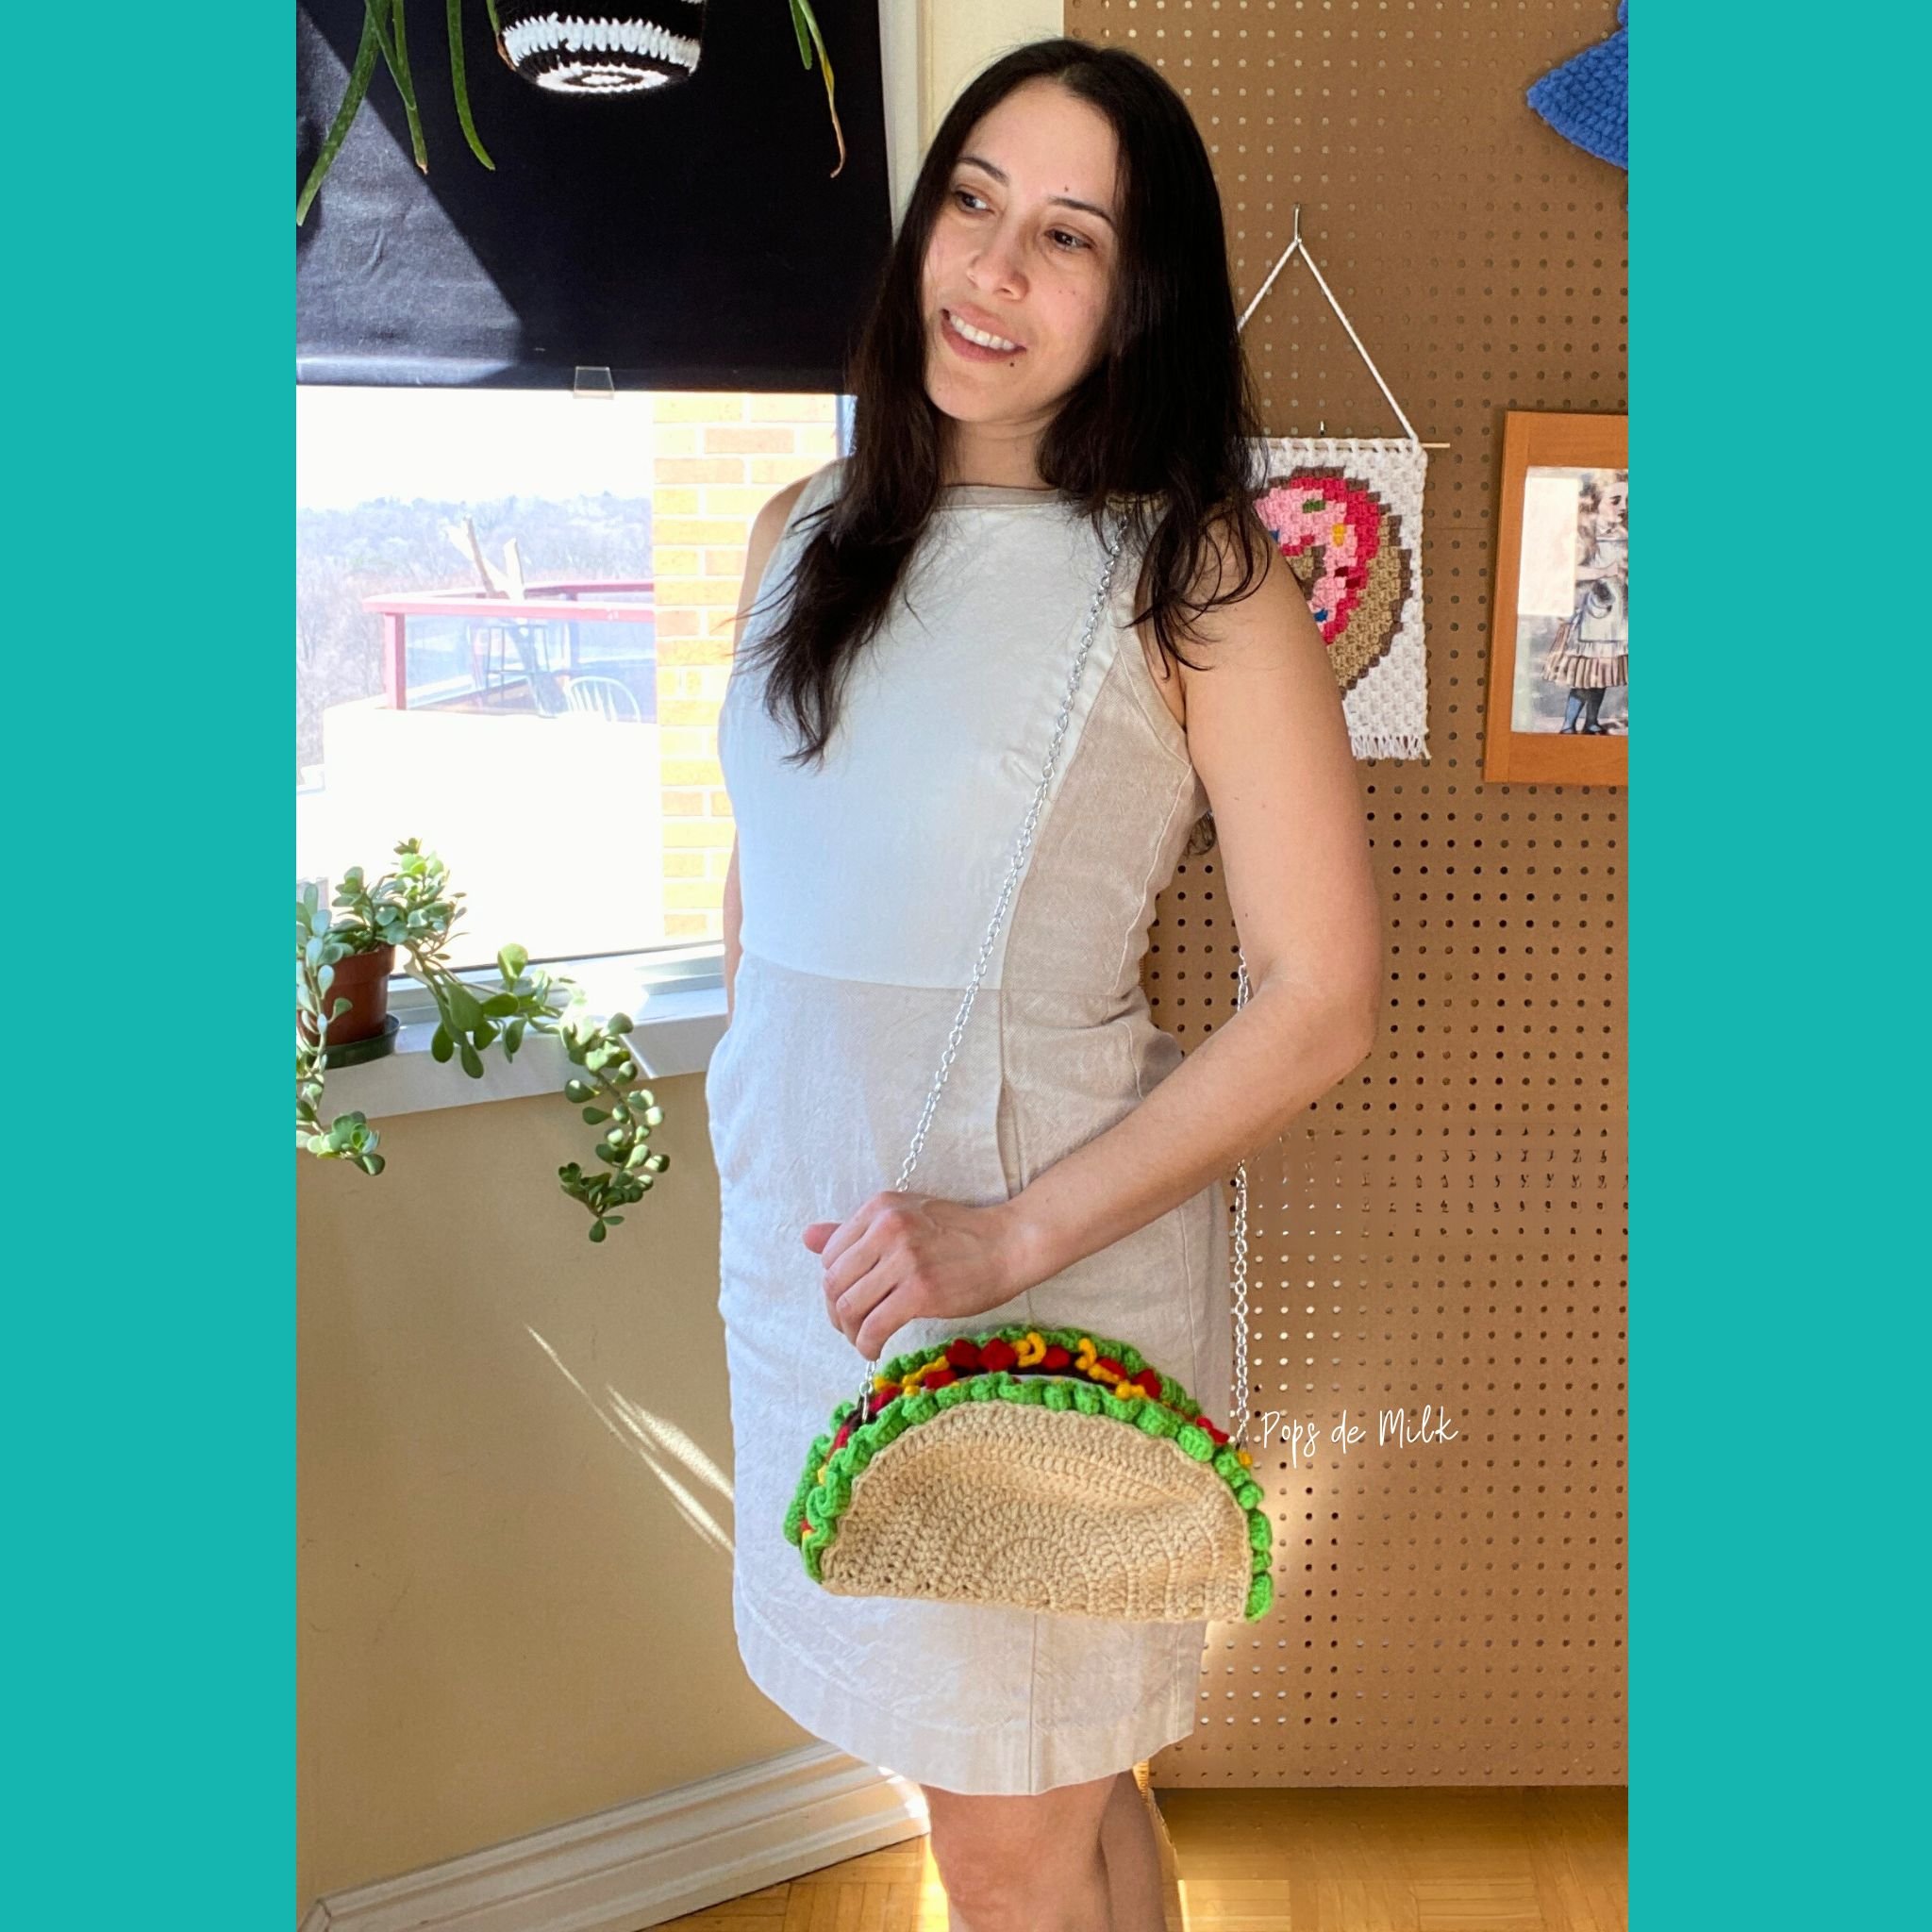
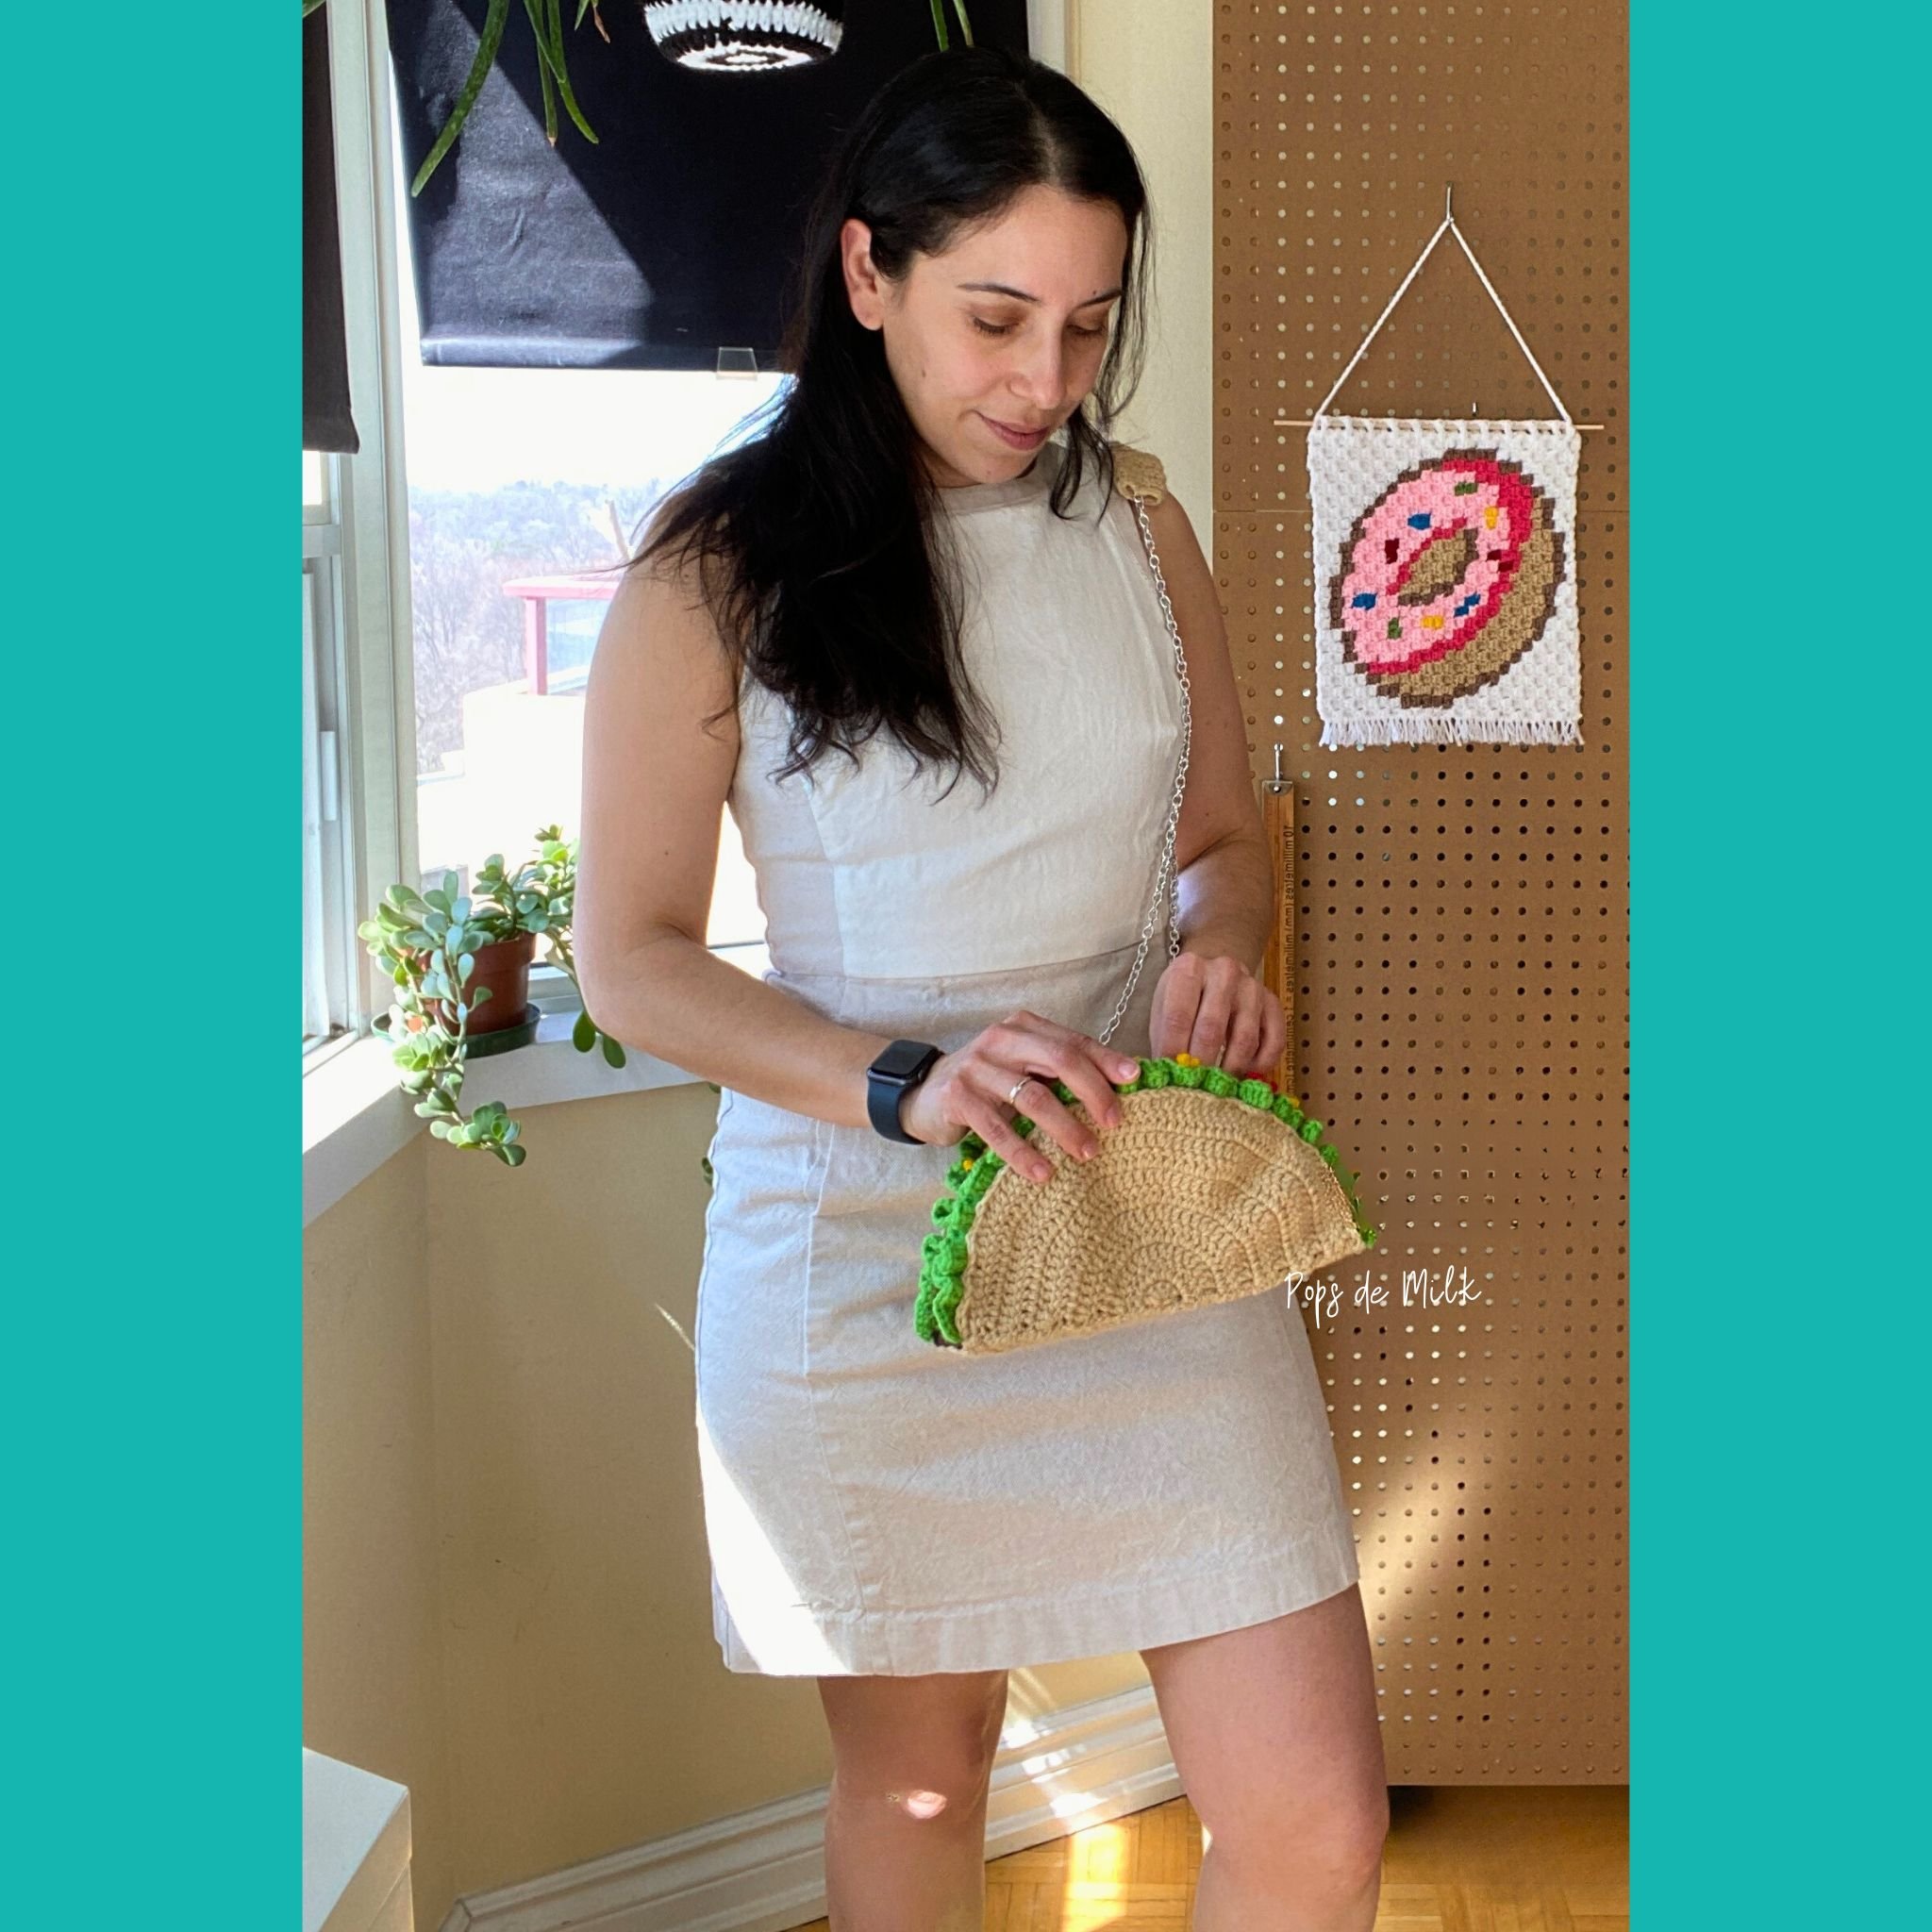
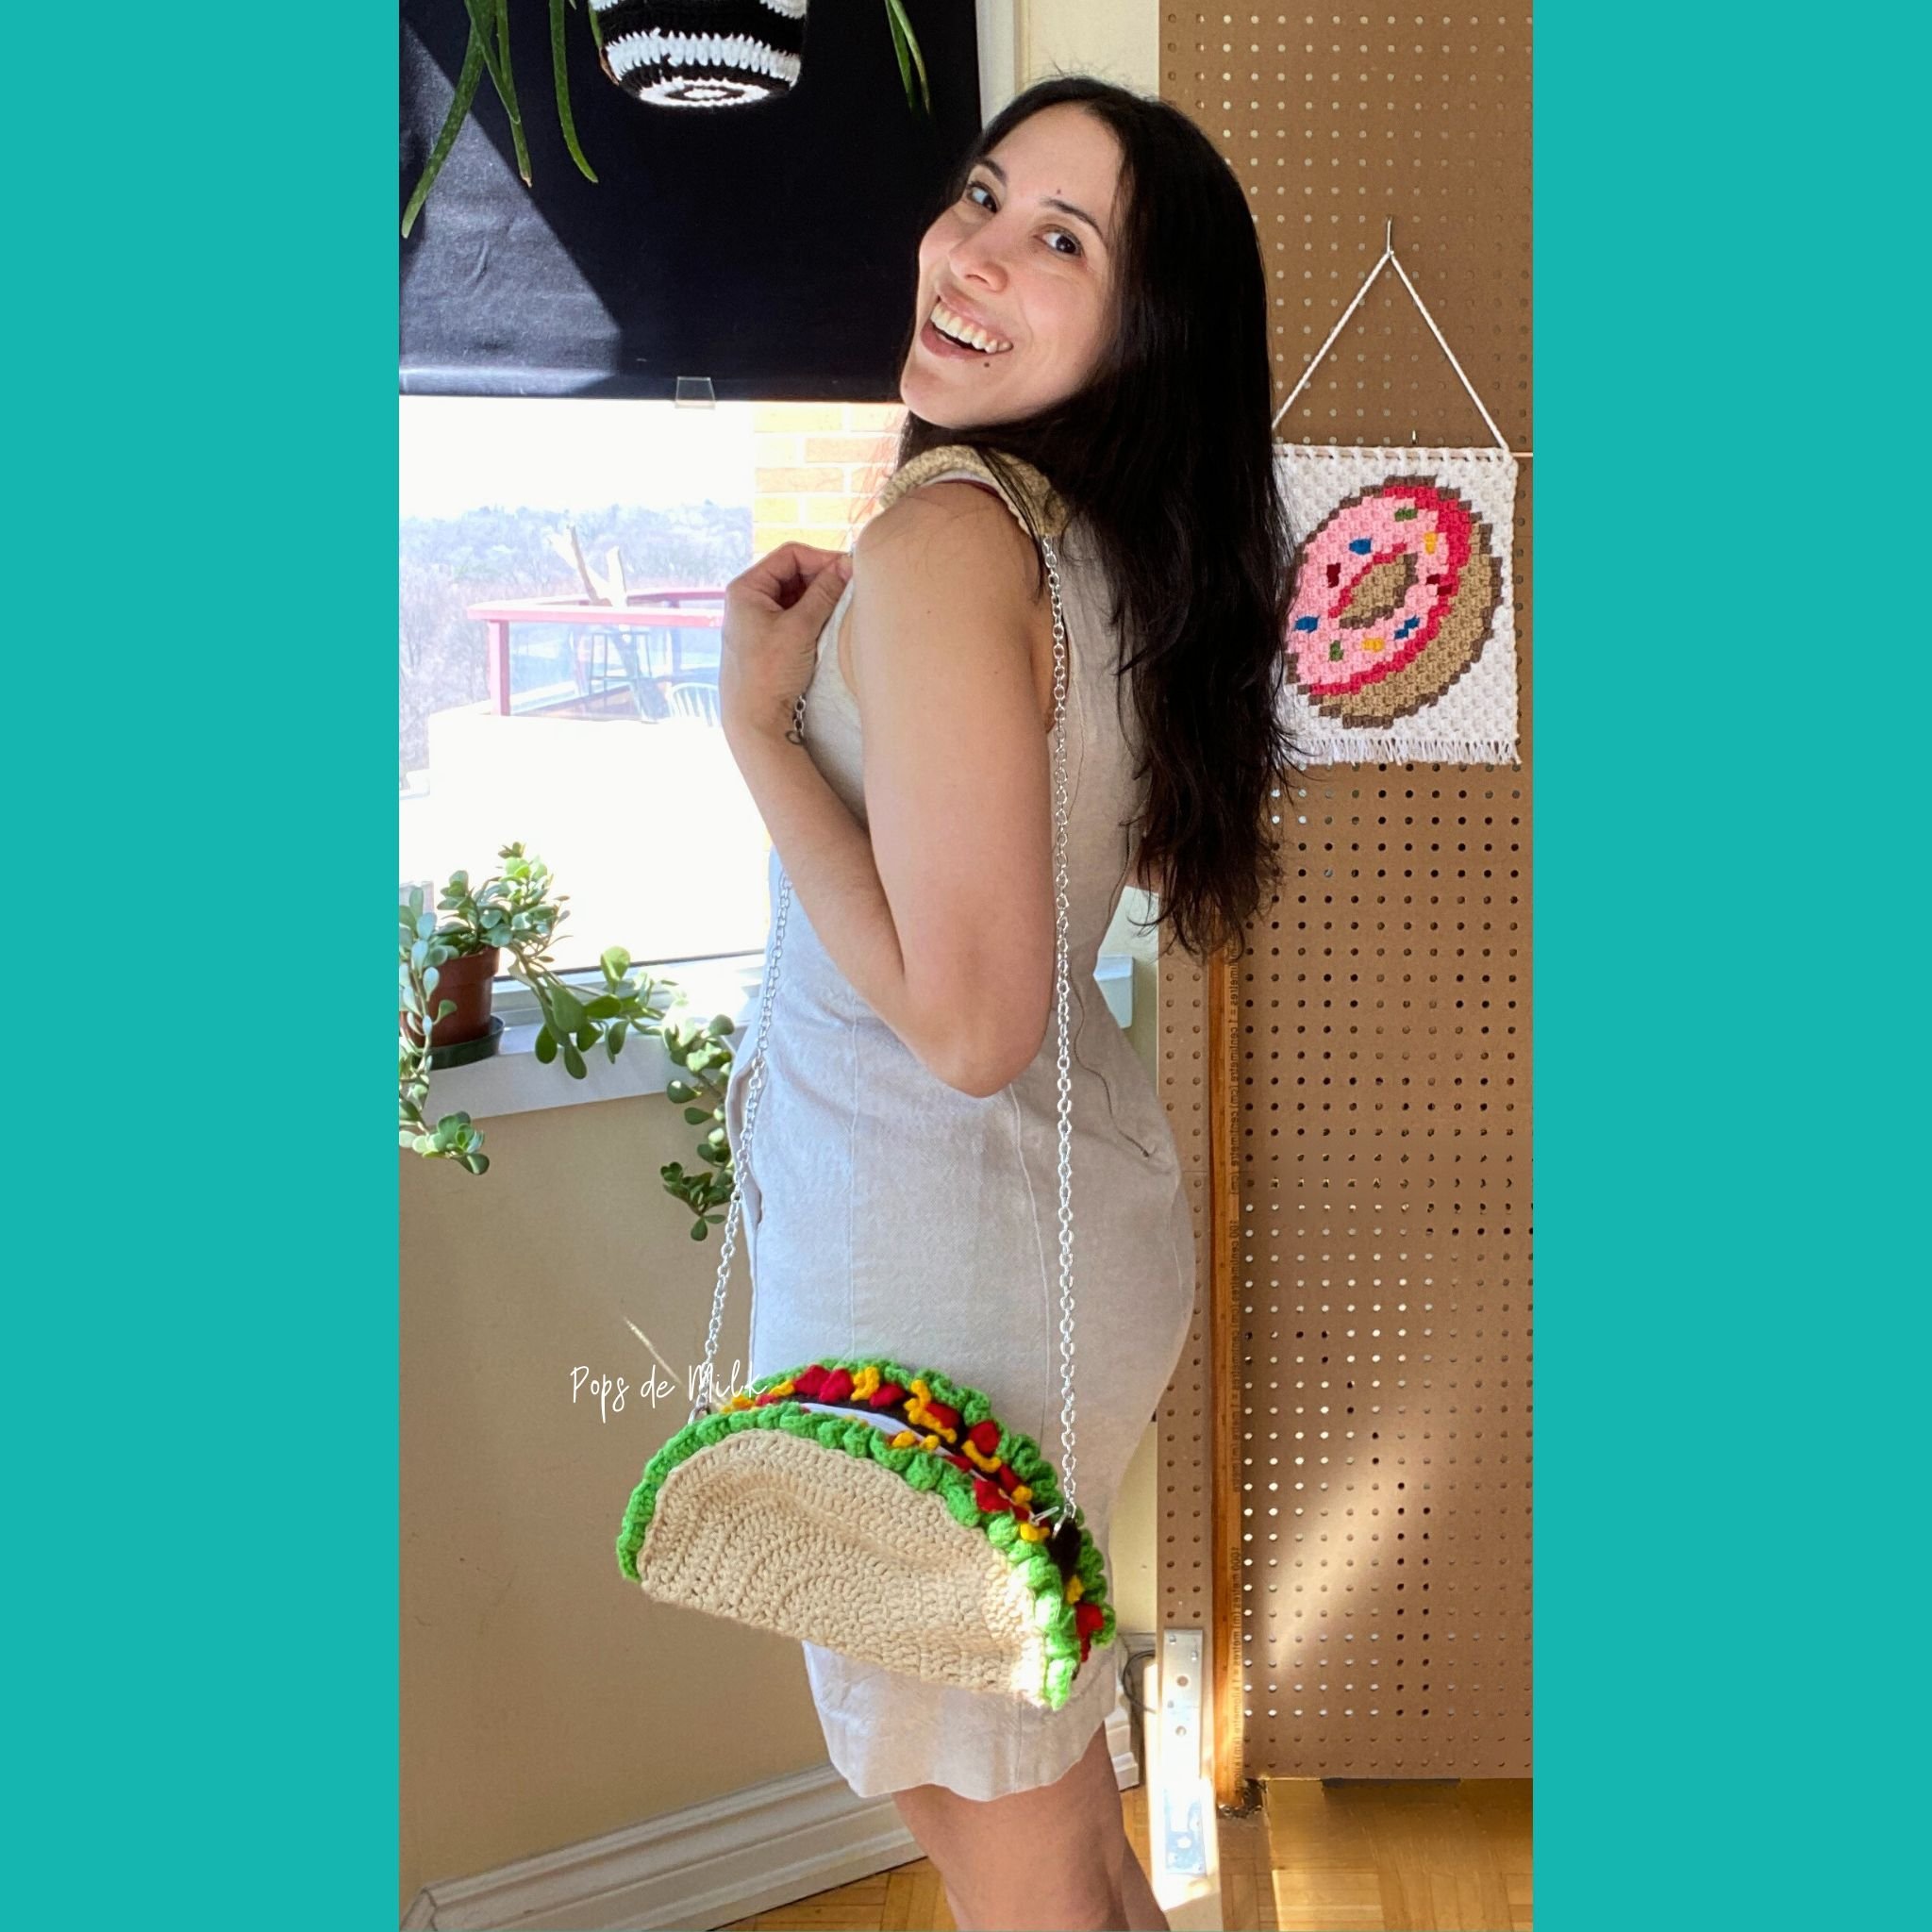
Taco Bag Crochet Pattern + Video
Are you a crafting enthusiast looking for a new DIY project? If you enjoy crocheting and want to create something both practical and fun, I've got just the thing for you! I recently designed a crochet pattern for a taco-themed bag that's sure to impress. With its vibrant colors, various stitch patterns, and bright toppings, this project is a great way to practice your crafting skills and show off your love for tacos.
This bag is made with just a few simple materials and tools that are commonly used in crochet projects, such as yarn, a hook, and a zipper. Whether you're an experienced crocheter or a beginner looking for a new challenge, this pattern is easy to follow and will result in a unique and eye-catching accessory.
In this blog post, I'll share with you the inspiration behind my design, the materials and tools you'll need to make it, and the step-by-step instructions to crochet your own taco bag. So, grab your hook, yarn, and let's get started on this fun and delicious project!
Keep scrolling for the free crochet pattern or you can support my business by purchasing the inexpensive and ad-free PDF pattern in my shop, Etsy, or Ribblr.
When it comes to crafting, inspiration can come from anywhere. For me, it often starts with a simple idea or a technique I want to try out. That's how I came up with the idea of crocheting a zipper into a bag. But what kind of bag should it be? That's where a conversation with ChatGPT, the AI language model, came in handy. ChatGPT suggested that food-themed crochet projects were popular, and tacos were a particularly hot item. That's when the lightbulb went off in my head, and the crochet taco bag was born.
Taco Bag
Crochet Pattern
Size
Approx. 10.5” L x 5” H
Materials
Worsted weight (4) acrylic yarn, such as Bernat Super Value and/or Red Heart Super Saver in:
DK Heather (tan)
Chocolate
Bright Yellow
Red
Spring Green
3.50mm crochet hook
Yarn needle
White zipper, 8-12” long will do
Length of chain for the strap, my chain is approx. 50” long
2 keychain rings
(Optional) 1 sheet of plastic canvas
(Optional) Fabric for lining the inside of the bag
Needle and thread
Abbreviations (US terms)
sts - stitches
ch - chain
sc - single crochet
hdc - half double crochet
dc - double crochet
inc - increase (2 sts in the same st)
sl st - slip stitch
sk - skip

Notes
The taco bag is made up of the following parts:
Tortilla outer shell (2 half circles and 1 long rectangle for the base)
Meat filling (2 long and narrow strips)
Cheese (approx. 25 pieces)
Tomato (approx. 20 pieces)
Lettuce (2 curly cue strips)
Sour cream (white zipper)
Bag strap
There is a suggested order to make each part that I wish I had followed when I was making the bag…live and learn. But now that I know what I know, I can share that with you. I suggest that you crochet everything first before attaching or sewing anything together. If you are using plastic canvas, I suggest sewing those pieces together first and I also suggest cutting out half circles for the sides (I did not do this and really wish I had because it would have added more structure to the bag). I have written the suggested order in the Assembly section at the end of the instructions.
Tortilla
With DK Heather (tan)
Sides - make 2
Row 1: make 6 dc in magic ring, turn
Row 2: ch 2 (does not count as st throughout), dc inc in each st, turn (12 sts)
Row 3: ch 2, complete the following [dc inc in first st, dc in next st] x 6 (18 sts)
Row 4: ch 2, complete the following [dc inc in first st, dc in next 2 sts] x 6 (24 sts)
Row 5: ch 2, complete the following [dc inc in first st, dc in next 3 sts] x 6 (30 sts)
Row 6: ch 2, complete the following [dc inc in first st, dc in next 4 sts] x 6 (36 sts)
Row 7: ch 2, complete the following [dc inc in first st, dc in next 5 sts] x 6 (42 sts)
Row 8: ch 2, complete the following [dc inc in first st, dc in next 6 sts] x 6 (48 sts)
Row 9: ch 2, complete the following [dc inc in first st, dc in next 7 sts] x 6 (54 sts)
Row 10: ch 2, complete the following [dc inc in first st, dc in next 8 sts] x 6 (60 sts)
Row 11: ch 1, complete the following [sc inc in first st, sc in next 9 sts] x 6 (66 sts)
Bottom - make 1
Row 1: ch 17, sk 2 ch (counts as sc) sc in next ch, * sk 1 ch, 2sc in next ch, rep from * to last 2 ch, sk 1 ch, sc in last ch, turn (15 sts)
Row 2: ch 1, sc in the first st, *sk 1, 2sc in the next st, rep from * to last 2 sts, sk 1 sc, sc into tch, turn
Repeat row 2 until the rectangle is the same length as the sides, in my case I had 47 rows in total.
Cut yarn and leave a long tail for sewing.
Meat
With Chocolate (dark brown)
Make 2
Row 1: ch 81, sk 2 ch (counts as sc) sc in next ch, * sk 1 ch, 2sc in next ch, rep from * to last 2 ch, sk 1 ch, sc in last ch, turn
Row 2: ch 1, sc in the first st, *sk 1, 2sc in the next st, rep from * to last 2 sts, sk 1 sc, sc into tch, turn
Rows 3-4: Repeat row 2
Cut yarn and weave in ends.
Tomato
With Red
Make 20 or as many as you like
In magic ring, ch 1 (does not count as a stitch),1 sc, *ch 2, 2 sc, rep from * 2 more times, ch 2, 1 sc, join with sl st to first st.
Cut yarn and leave a long tail for sewing.
Shredded Cheese
With Bright Yellow
Make 25 or as many as you like
ch 8, sl st in 2nd ch from hook and each ch across.
Cut yarn and leave a long tail for sewing.
Lettuce
With Green
Make 2
Row 1: ch 76, hdc in 3rd ch from hook and each ch across, turn (74 sts)
Row 2: ch 2 (does not count as a stitch), make 3 dc in each st across.
Cut yarn and leave a long tail for sewing.
Strap Tabs
With Chocolate
Make 2
Row 1: ch 8, sc in 2nd ch from hook and each ch across, turn (7 sts)
Row 2: ch 1 (does not count as a stitch), sc in each st across, turn (7 sts)
Repeat Row 2 until the rectangle is approx. 2.5-3 inches long or desired length.
Cut yarn and leave a long tail for sewing.
Shoulder Strap
With DK Heather
Make 1
Row 1: ch 17, sk 2 ch (counts as sc) sc in next ch, * sk 1 ch, 2sc in next ch, rep from * to last 2 ch, sk 1 ch, sc in last ch, turn
Row 2: ch 1, sc in the first st, *sk 1, 2sc in the next st, rep from * to last 2 sts, sk 1 sc, sc into tch, turn
Repeat row 2 until the rectangle is approx. 5.5”, in my case I had 25 rows in total. You can make this longer or shorter if you prefer.
Cut yarn and leave a long tail for sewing. Sew the rectangle lengthwise to make a tube.
Assembly
It’s time to assemble the taco!
Here’s the order I wish I had followed when assembling my taco bag:
Sew the tortilla pieces together: Align the long rectangle between the straight edges of the half circles and sew the pieces together. It’s best to sew with the right sides facing and using a whip stitch so that the seams are defined.
*If you’re using a fabric liner, now is the time to use the tortilla (long oval shape) and meat (two narrow rectangle shapes for the zipper) pieces as a template to measure and cut your fabric liner so it’s ready to go when you need it in Step 6. I am not an experienced sewer (sewist?) so if you have a preferred way of making a bag liner by all means do that, just make sure it fits well inside the bag.
*If you’re using plastic canvas, now is also the time to measure and cut the plastic canvas. You’ll need plastic canvas for the two half circles, the bottom of the bag rectangle, and two strips that will fit under the zipper (we’ll call these the zipper strips). For the zipper strips, cut the plastic canvas strips a little narrower than the meat strips so there’s room for the zipper to easily open and close. Once you have the plastic canvas pieces cut out, sew them together as follows:
Sew the half circles to the rectangle (same as the tortilla in Step 1).
Sew one zipper strip onto the rounded edge of one of the half circles and repeat with the other strip and half circle.
You’ll have a plastic canvas taco shell 🤓
Sew the zipper onto the Meat strips.
Sew the Meat and Lettuce together: Align the lettuce along the meat strips, making sure to uncurl it as you work.
Sew the tomato and cheese bits onto the meat and lettuce as well as the Strap Tabs (don’t forget the keychain ring!). The Strap Tabs seam should fall somewhere at or just below where the zipper ends.
Put the plastic canvas shell in the tortilla shell and sew to the bottom.
Place the fabric liner inside the bag. The fabric liner should cover the space under the zipper but still leave enough room for the zipper to move back and forth. With the liner in place, sew through all the layers (crochet, plastic canvas, and fabric) along the zipper and along the lettuce/meat/tortilla edge.
Feed the chain strap through the Shoulder Strap tube and use the yarn tail sew it where you find it most comfortable, or somewhere in the middle of the chain strap.
Lastly, attach the chain to the keychain rings and your bag is done!

If you make this crochet taco bag I'd love to see your creation, just tag me on Instagram @popsdemilk_crochet and use the hashtag #popsdemilk
Looking for more crochet bag patterns? Then you might like these:
**********
This pattern is for personal use only. The pattern and its photos may not be reproduced, distributed or resold, translated, published, altered, shared or posted in any way over the internet or offline.
You may sell finished items made from this pattern as long as it is handmade by you, not mass produced, giving the credit to Pops de Milk / Patricia Castillo as the designer. If you have any questions, you can email me at patricia@popsdemilk.com