
Scrap Yarn Beanie Crochet Pattern + Video
You know what I need? Another hat. Even though it's been an oddly warm winter, I can't leave the house without something on my head. So, I decided to embark on a cozy crafting adventure and make myself a beanie using scraps from my yarn stash.
Why yarn scraps?
Crafting with scrap yarn isn't just about using up odds and ends – it's about embracing creativity and resourcefulness. Each scrap carries memories of past projects and holds the potential to become something new and beautiful. By repurposing leftover yarn, we not only reduce waste but also breathe new life into forgotten fibers.
Now, let's talk about the benefits of making a beanie from scrap yarn. First and foremost, it's a sustainable choice. Instead of letting those leftover bits languish in the bottom of your yarn bin, why not give them a second chance to shine? Plus, using scraps allows for endless color combinations and unique patterns. No two beanies will ever be the same, making each creation truly one-of-a-kind.
But perhaps the best part of crocheting with scrap yarn is the sense of satisfaction that comes from turning chaos into order. Watching those jumbled tangles transform into neat little cakes or balls of yarn is a small but satisfying victory. And when you see the finished beanie come together, you'll feel a sense of pride knowing that you've made something beautiful out of seemingly nothing.
So, whether you're a seasoned crocheter looking for a new project or a beginner eager to dive into the world of yarn crafts, making a beanie from scrap yarn is a rewarding endeavor. Not only will you end up with a cozy accessory to keep you warm on chilly days, but you'll also have the satisfaction of knowing that you've created something unique and sustainable.
Now that you're ready to embark on your own scrap yarn adventure, let's dive into the pattern and instructions for crafting your very own cozy crochet beanie. With a little creativity and a lot of heart, you'll have a stylish new accessory in no time!
Easy Crochet Beanie from Scrap Yarn
Materials
4.50mm hook
Worsted weight yarn, my hat ended up needing approx. 200 grams
Yarn needle
Scissors
Abbreviations (US Terminology)
ch - chain
sc - single crochet
hdc - half double crochet
BLO - back loop only
Notes
Stitches are worked into the back loops only except for the first and last stitches of each row. Starting chain does not count as a stitch. When starting a new row I usually start with one chain but you can also start with two chains if you prefer.
Sizing
I would recommend using a hat you already own to help with measuring and figuring out how many chains you need to start with. I used a store-bought beanie, unfolded to full length to get the approx. length from bottom to top. I also measured the hat, laid flat, across at the brim to get the diameter.
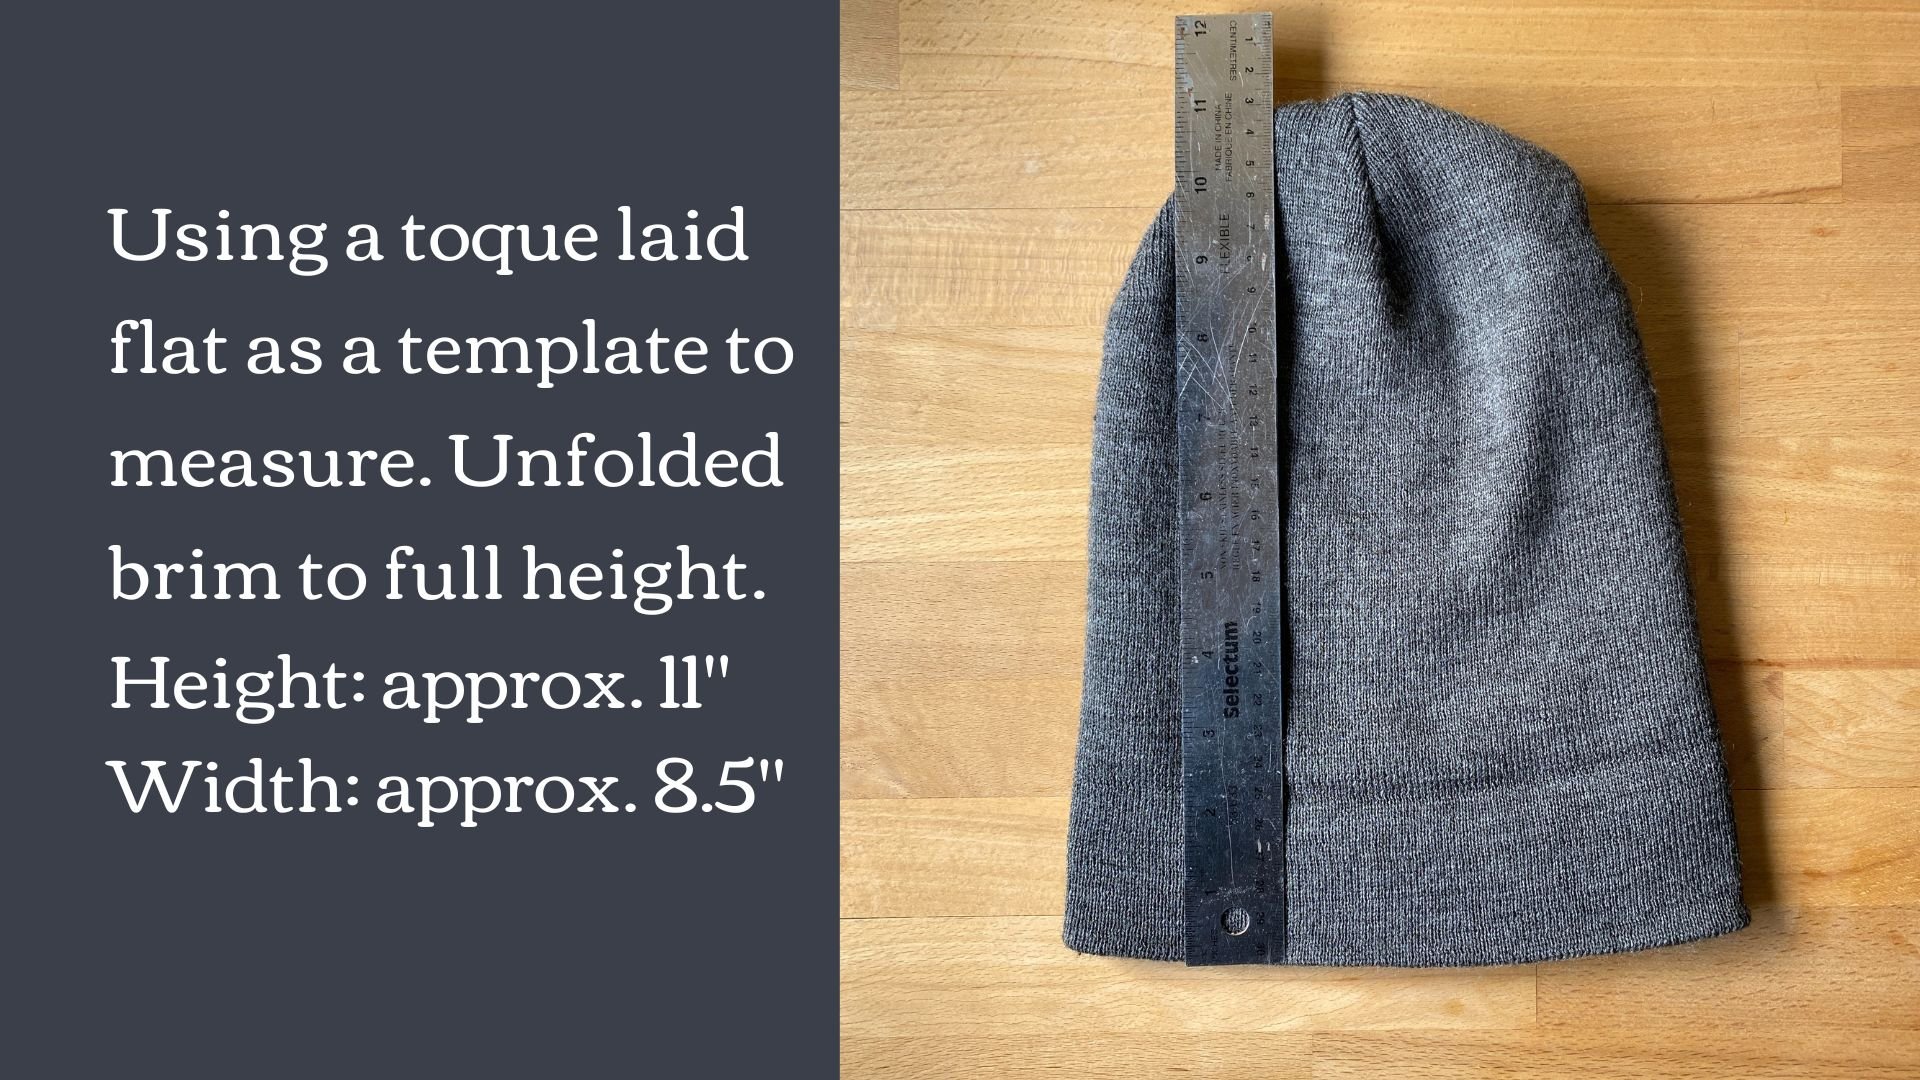
Measurements for my hat, without stretching, were:
Length: 11"
Width: 17” (8.5” folded in half)
Making Scrap Yarn
Select your colors from your bin of yarn and start joining the ends using a secure knot like the magic knot. You can also wind the yarn into a ball without knotting the ends together and join the yarn as you work. Or just leave your scraps loose and select them as you crochet your beanie.
Crochet Beanie Pattern
Work the first and last stitch of the row in both loops. Work remaining stitches in the back loop only. The top of the hat is the edge that ends with the 5 single crochet stitches.

Row 1: chain until the length is approx. 11" or desired length to make it slouchier. I chained 42. hdc in the 2nd ch from hook and each ch across to the last 5 chs, sc in the last 5 chs, turn
Row 2: ch 1, sc in the first 5 sts, hdc in remaining sts across, turn
Row 3: ch 1, hdc across to last 5 sts, sc in last 5 sts, turn
Repeat Rows 2 and 3 until the hat measures approx. 17" or it fits comfortably snug around your head. I worked 44 rows total making sure to end on a Row 2 so this way I would stitch the seam up toward the end with the 5 single crochet stitches and seamlessly continue on to closing the top.

Finishing the hat
I used an invisible seam to close the seam but you can also use a whip stitch or use your crochet hook to slip stitch the hat together. Don’t cut the yarn yet. Leave a good length of yarn to close the top of the hat with a yarn needle. Insert the threaded needle in and out of every other single crochet row edge until you’ve reached the start. Then just pull the yarn like a drawstring to close the hat. Pull tight and weave it in several times and finish with a knot.
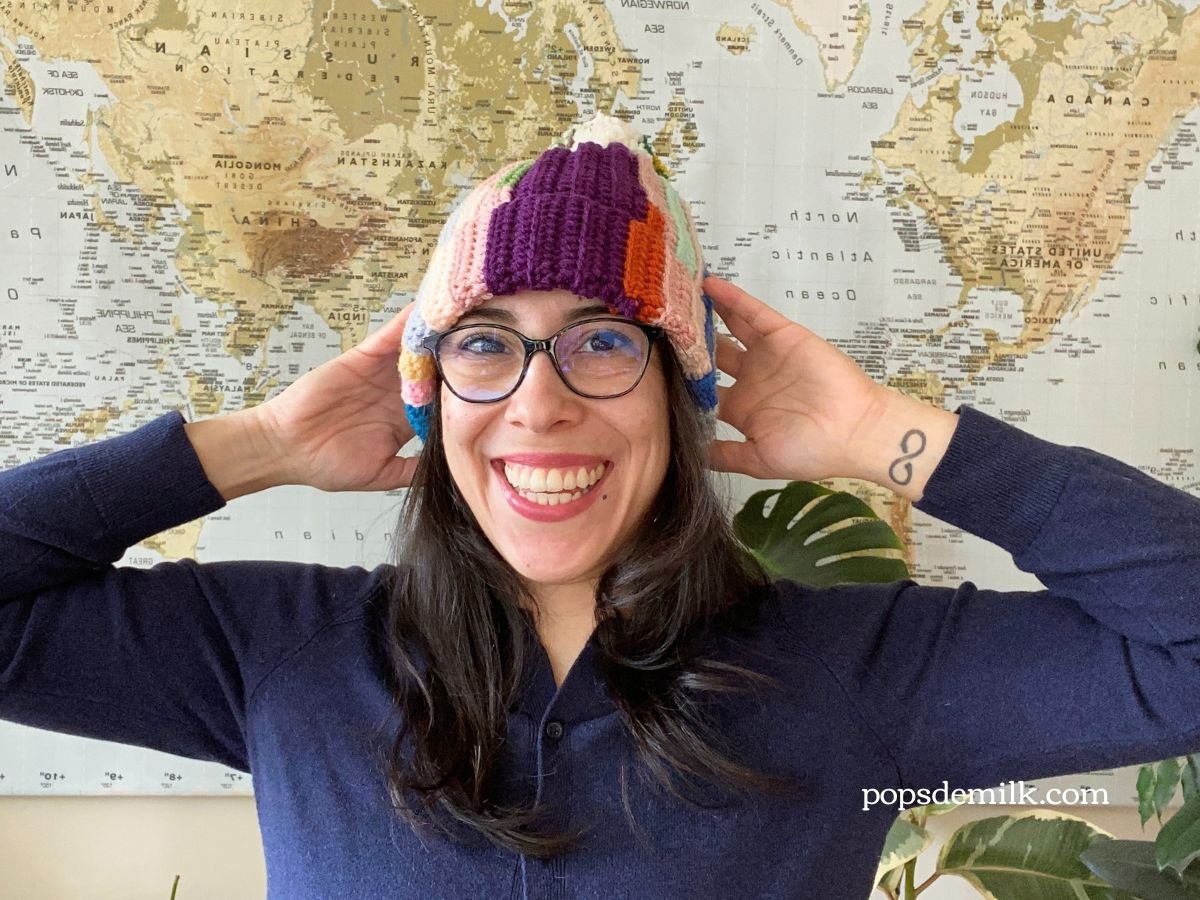
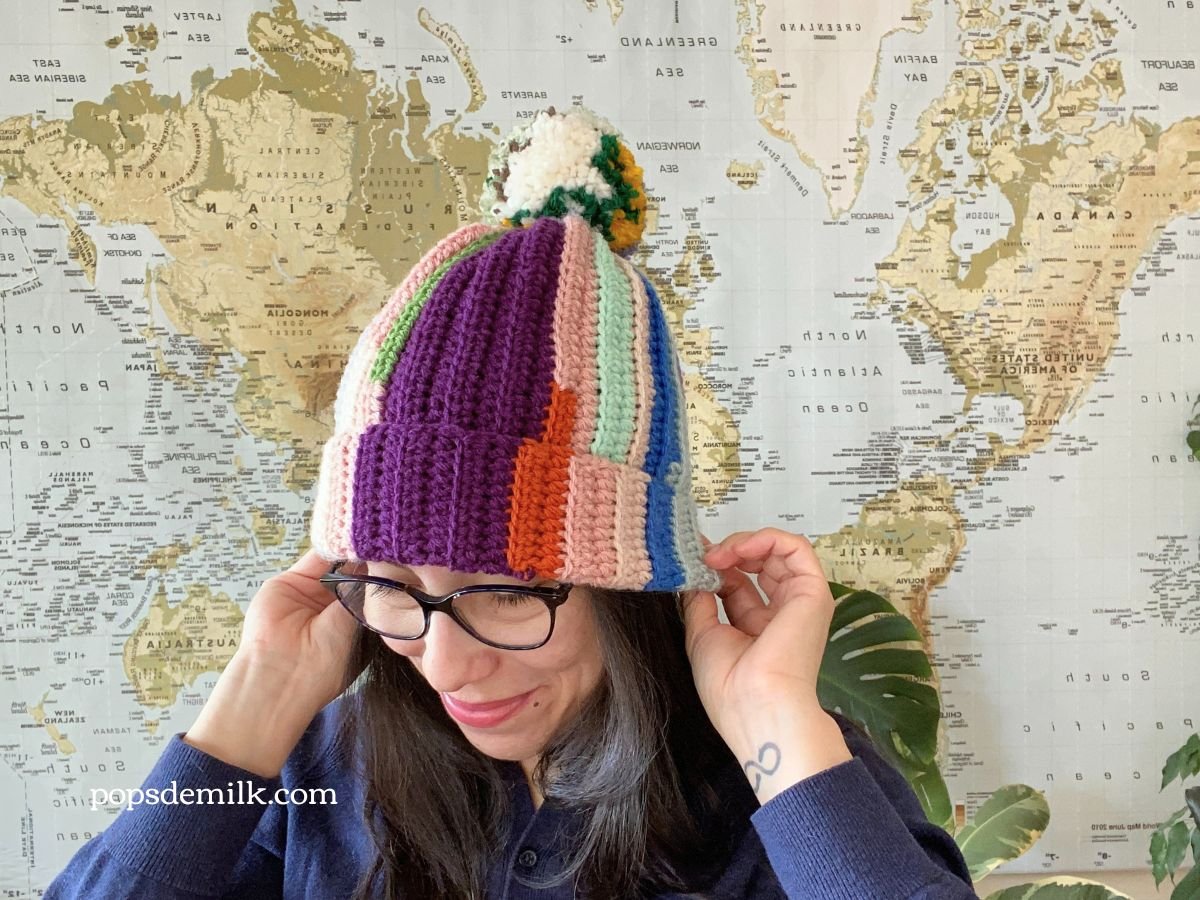
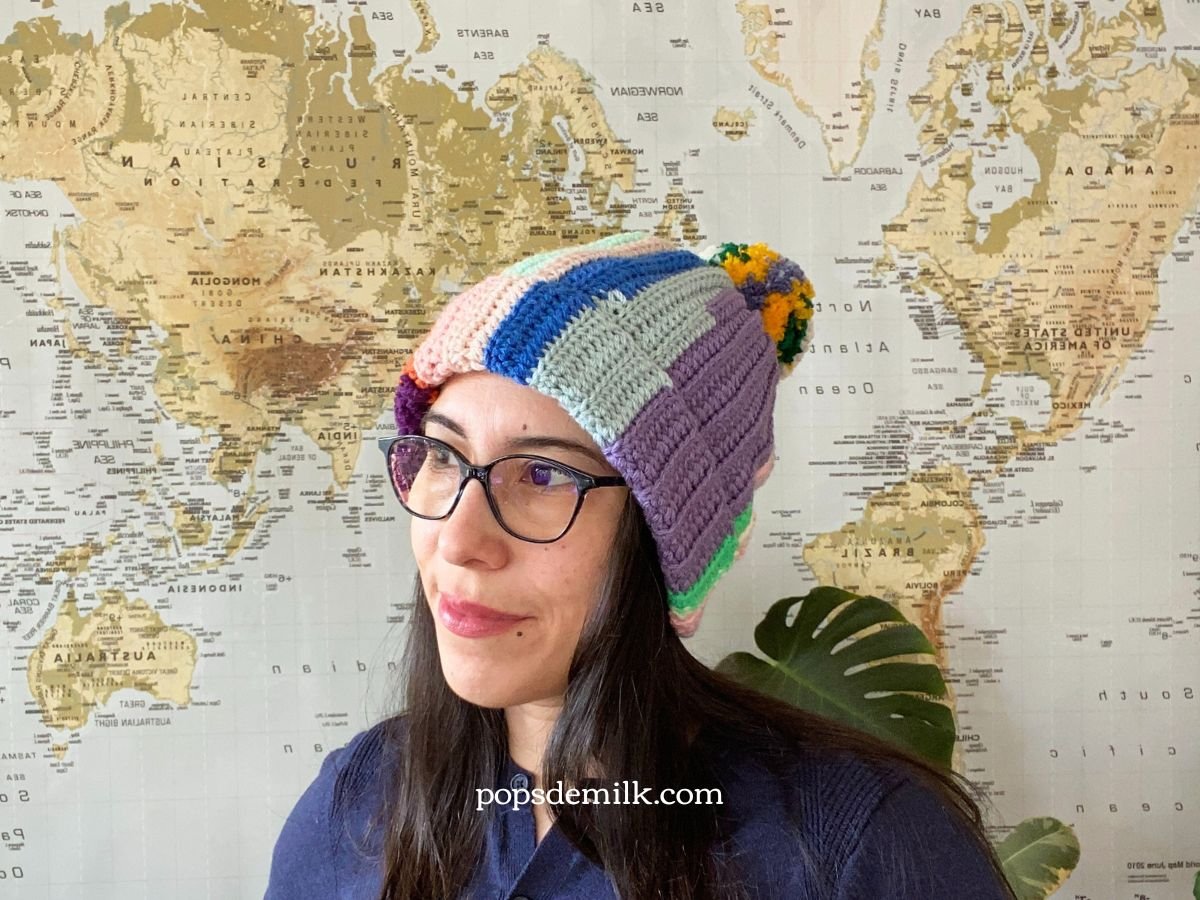
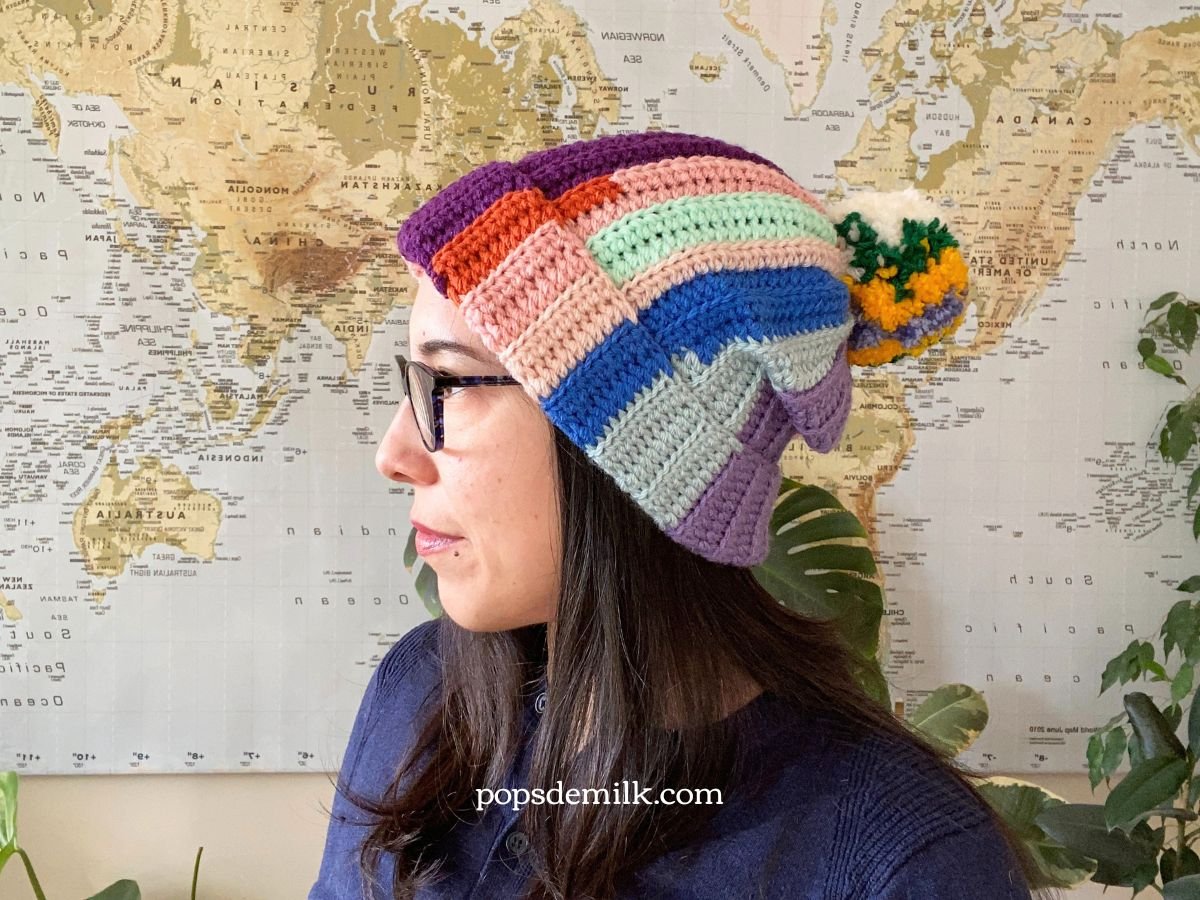
Your hat is now ready to wear! You can wear it as is or adorn it with a pom pom.

If you make this crochet beanie from scrap yarn I would love to see your creation, just tag me on Instagram @popsdemilk_crochet
**********
This pattern is for personal use only. The pattern and its photos may not be reproduced, distributed or resold, translated, published, altered, shared or posted in any way over the internet or offline.
You may sell finished items made from this pattern as long as it is handmade by you, not mass produced, giving the credit to Pops de Milk / Patricia Castillo as the designer. If you have any questions, you can email me at patricia@popsdemilk.com