
Electric Granny Square Vest Crochet Pattern + Video
Are you ready for a crochet adventure that’s both fun and fashionable? Today, we’re diving into the world of granny square vests—a project that’s been on my to-do list for what feels like eons. Join me as I share the process of how I made this crochet granny square vest, complete with tips, tricks, and inspiration.
Choosing the Perfect Pattern
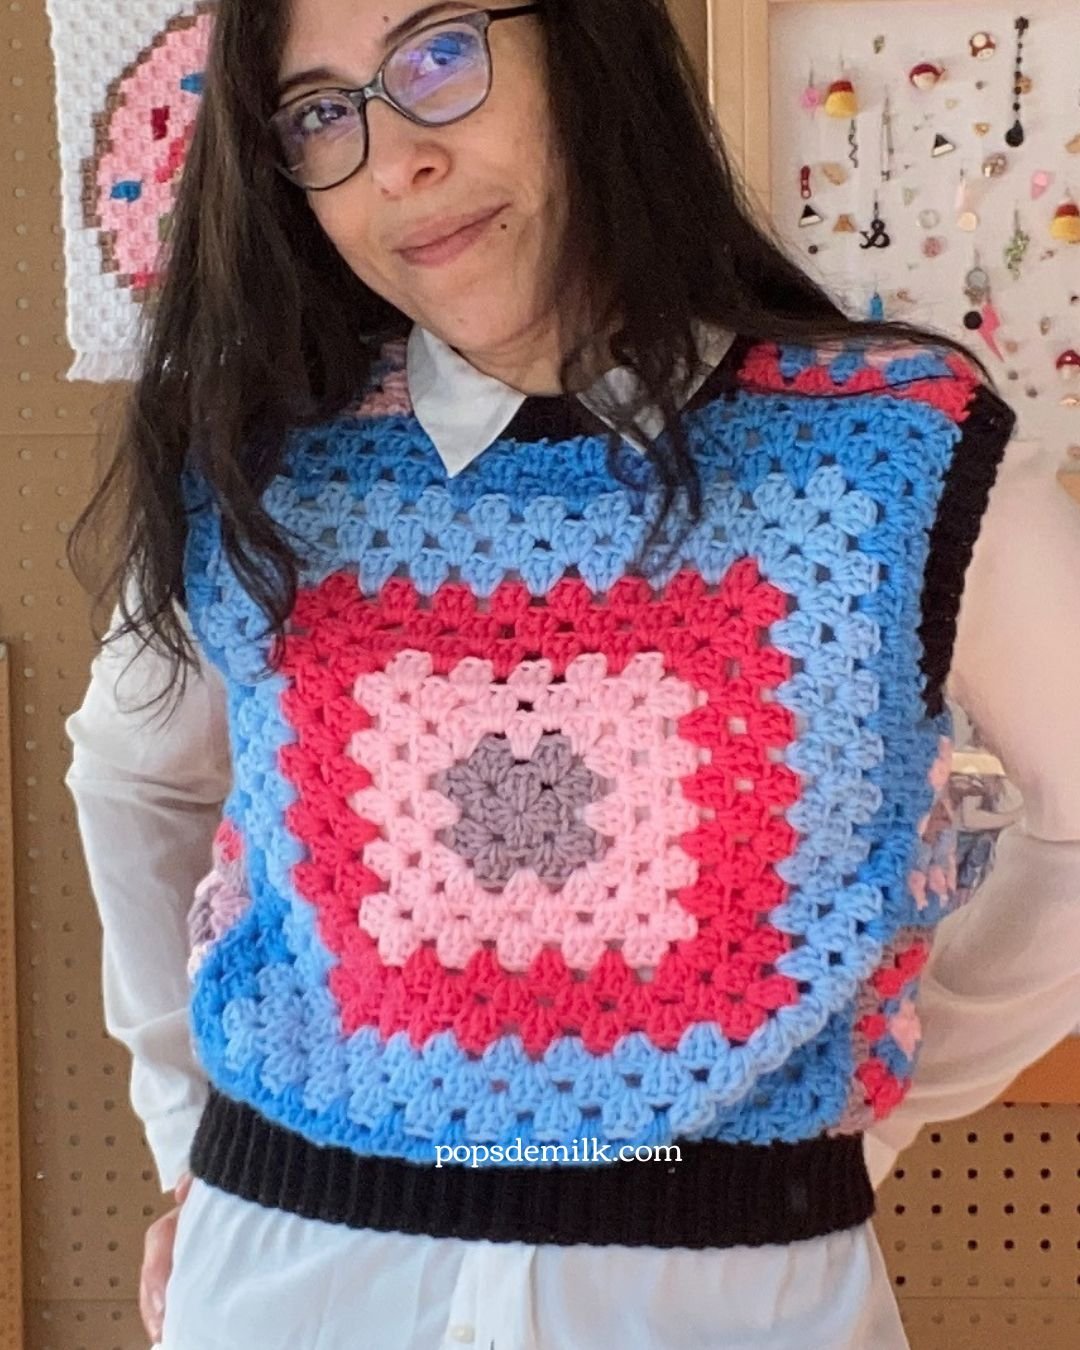
First things first, let’s talk patterns. For my granny square vest, I opted for a classic design featuring front, back, shoulder, and side pieces. It’s essentially like piecing together a cozy puzzle made of yarn. The front and back panels are giant squares, while the shoulders and sides are smaller squares—simple yet oh-so-stylish.
The Color Conundrum
Ah, color—the ultimate creative quandary. Do I go for solid hues or embrace a riot of colors? This is where I often find myself in the throes of analysis paralysis. Should I stick to one color scheme or mix it up with a kaleidoscope of shades? The struggle is real, my friends. But remember, experimentation is the heart of creativity!
Yarn Matters
Now, let’s talk yarn. While I dream of indulging in luxurious blends, my practical side kicks in. Enter acrylic yarn—a budget-friendly, dog-friendly, and beginner-friendly choice. For my granny square vest, I’m using Bernat Super Value and Caron One Pound.

Crochet Granny Square Vest
Materials
Worsted weight (4) yarn, I used Bernat Super Value and Caron One Pound. My vest used approx. 300 grams of yarn in total with all colors combined.
5.00mm hook
Yarn needle
Scissors
Abbreviations (US Terminology)
ch - chain
dc - double crochet
hdc - half double crochet
ch-sp - chain space
st - stitch
Notes
Starting chains do not count as a stitch. End each round with a half double crochet instead of making a slip to join. Do not turn at the end of each round. You can adjust the finished vest to your measurements by working more or less rounds in your granny squares. Once all the squares were joined, my vest measured about 33” at the waist, which is a comfortable for me. With the bottom rib hem my vest measured about 19.5” from shoulder to bottom hem.
To make the vest you’ll need:
Two large granny squares (my squares were about 15” x 15”)
Six small granny squares (my squares were about 5” x 5”)
Granny Square Pattern
Check out my video tutorial on how to crochet a basic granny square.
Round 1: In magic ring, ch 2 (does not count as a stitch), [dc 3, ch 2] x 3, dc 3, hdc into the first st.
Round 2: ch 2, dc 3 into space under the hdc, * in the next ch-sp work [dc 3, ch 2, dc 3], repeat from * to last ch-sp, dc 3 in last ch-sp, hdc into first st.
Round 3: ch 2, dc 3 into space under the hdc, * dc 3 in the next space between clusters, in next ch-sp work [dc 3, ch 2, dc 3], repeat from * to last ch-sp, dc 3 in last ch-sp, hdc into first st.
Repeat Round 3 until you have the size you need for your squares. In my case, the large squares were 14 rounds and the small squares were 4 rounds.
Assembling the vest
My preferred method is the invisible seam but you can use any joining method you prefer. You can use a whip stitch or use your hook to slip stitch the squares together. Use two small squares for the shoulders. Use two small squares for each side.
Adding a ribbed hem
Last but not least, it’s time for the finishing touches. I opt for a ribbed hem along the bottom, neckline, and armholes—because who can resist the polished charm of a ribbed edge? It may take a bit of time, but the end result is well worth the effort. I worked rows of single crochet in the back loop only to achieve the ribbed look.
Check out my video tutorial on how to add a ribbed hem.
And voila! After countless stitches and a few color-induced dilemmas, the granny square vest is finally complete. As I slip it on, I can’t help but smile at the vibrant assortment of colors—the embodiment of my creative spirit. From bright electric hues to soft pastels, each square tells a story, weaving together to create a wearable work of art.


So there you have it—a glimpse into the colorful world of granny square vests. Whether you’re a seasoned crocheter or a newbie with a hook in hand, this project is sure to spark joy and ignite your passion for yarn crafts.
If you make this crochet granny square vest I would love to see your creation, just tag me on Instagram @popsdemilk_crochet
Want to see more granny square projects? Check these out:
**********
This pattern is for personal use only. The pattern and its photos may not be reproduced, distributed or resold, translated, published, altered, shared or posted in any way over the internet or offline.
You may sell finished items made from this pattern as long as it is handmade by you, not mass produced, giving the credit to Pops de Milk / Patricia Castillo as the designer. If you have any questions, you can email me at patricia@popsdemilk.com